Cloud projects and wallets
Important
Only a user with the admin role can see and use option Cloud projects/Wallets under section Billing and Reporting.
In OpenStack environments, a project represents an isolated workspace where users can create and manage cloud resources such as virtual machines, volumes, and networks. Each project has its own quotas, permissions, and billing configuration, allowing organizations to separate workloads and track resource usage independently.
This article explains how to use the cloud environment Dashboard to manage your cloud projects and wallets, including project activation, wallet assignment, and billing verification.
What we are going to cover
Prerequisites
No. 1 Account on cloud environment Dashboard
You need an active user account and access to the cloud environment Dashboard at https://my.cloud.eumetsat.int. Use this interface to manage wallets and cloud projects.
No. 2 Access to Horizon
You should also be able to log in to Horizon at https://horizon.cloudferro.com/auth/login/?next=/. Horizon is used to verify OpenStack projects, quotas, and resource usage.
No. 3 Configured and funded wallet
Wallets for R1 and R2 are funded in advance, while for access to FRA1-3 cloud, you should have an active and funded wallet.
No. 4 Admin permission
To manage projects and wallets you need an Admin permission.
Wallets (overview)
A wallet is the billing source for projects. You may have one shared wallet or multiple wallets for separation by project or contract.
Wallet states in the Dashboard
Term |
Meaning |
|---|---|
Current wallet |
The wallet used now for billing the region/project. |
Next wallet |
A scheduled replacement wallet that becomes current on its start date. |
Wallet inheritance |
If there’s a date gap, the project temporarily uses the parent account’s wallet. |
Examples
One wallet, many regions: set the wallet on the region so that all new projects in that region inherit it by default.
Separate wallets by workload: set different wallets on individual projects within a region to isolate costs between teams or environments.
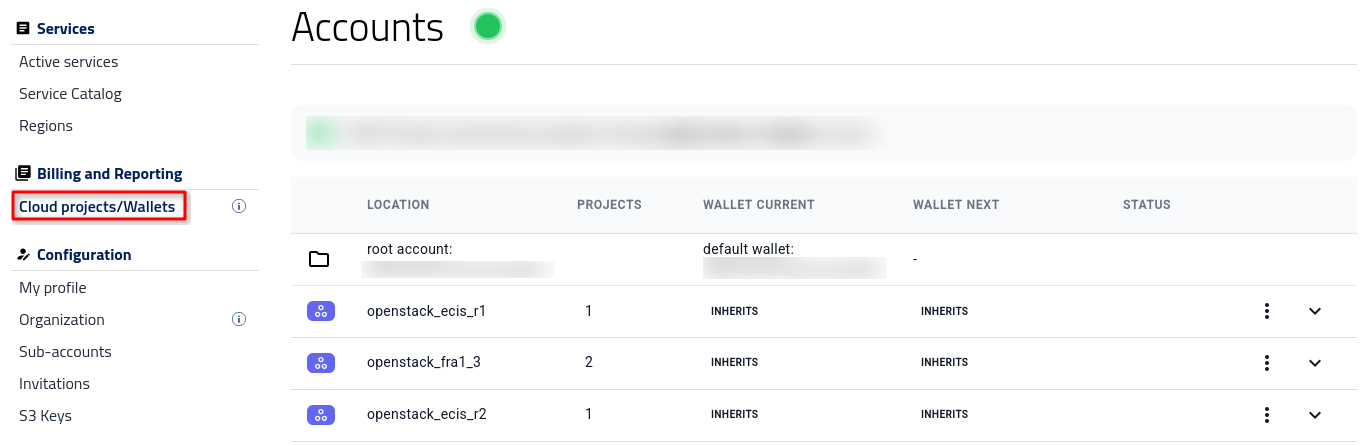
Cloud projects/Wallets view
After logging into https://my.cloud.eumetsat.int, click Cloud projects/Wallets in the left menu bar to view the details of your projects.
Dashboard view showing the Cloud projects/Wallets section, where all project and wallet details are listed.
This view shows the table of active cloud regions for your account.
To see what projects are active in a region, click on the row for that region. The following image shows all three regions activated in that way:
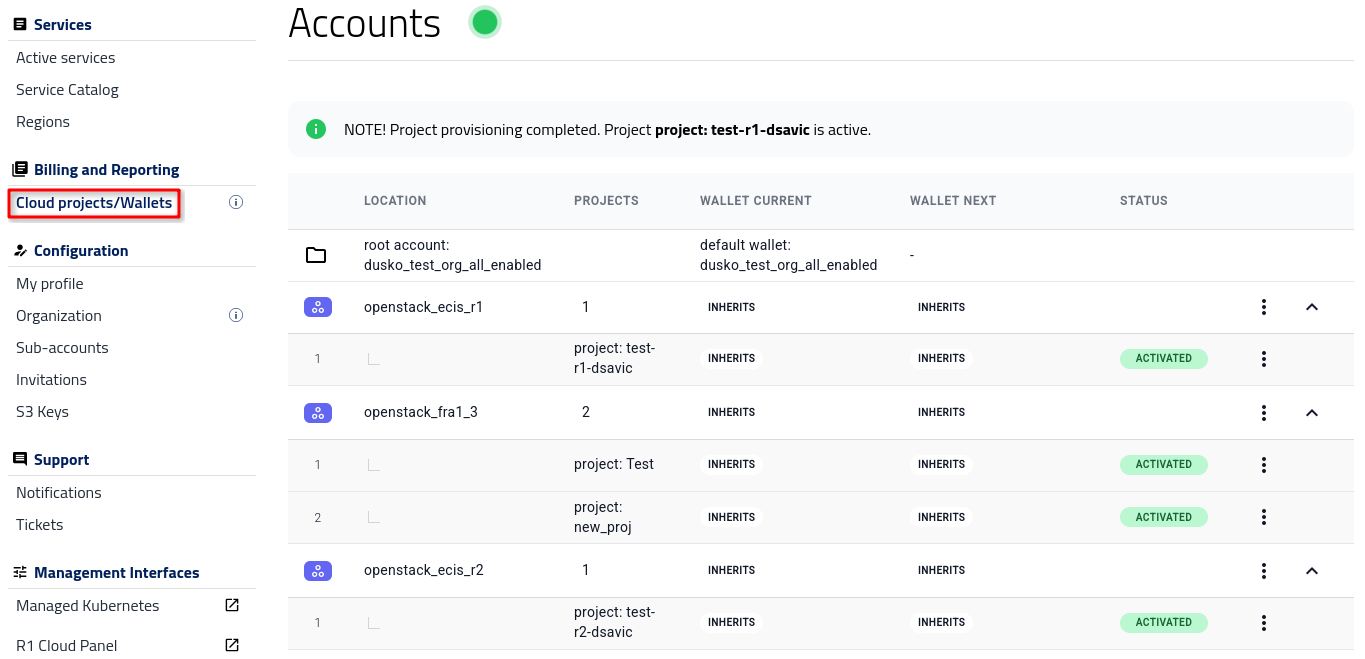
Here we see the projects that already exist in the corresponding OpenStack environment. For instance, FRA1-3 has two projects active:

If one or more projects have already been used to create resources (for example, virtual machines), the number of instances and RAM used will no longer be 0 in that region.
Attaching wallets to projects in the Dashboard
Initially, you will have only one active wallet, and the default wallet is inherited across all of the cloud regions.
The current wallet defines the active billing source, while the next wallet allows you to schedule a future switch without interrupting services.
You can attach a wallet to a region or to a specific project. The wallet attached to the region will be the default for all of the projects within that region.
Attach wallet to a region
Attach the appropriate wallet to the region — this determines from which funds the projects’ expenses will be drawn.
To change the wallet, click the three-dots menu in the row of the region and choose whether to modify the current or next wallet:
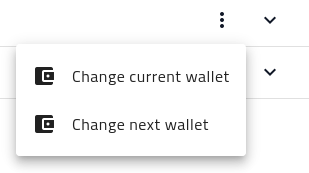
Options menu for editing the current or next wallet assigned to a region.
This opens a new entry window:
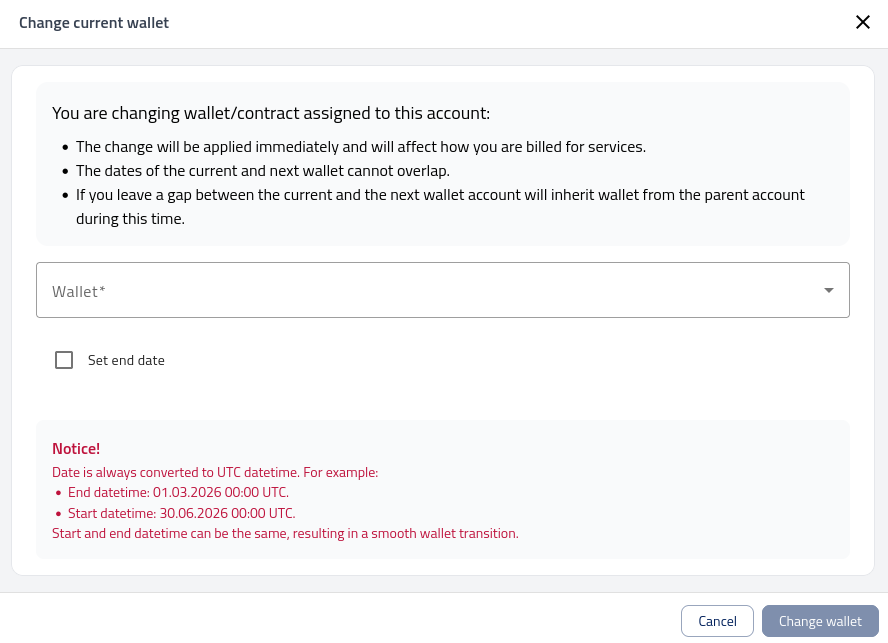
Form for assigning or scheduling a wallet change for the selected project.
Note
The following conditions apply when changing wallets:
The change of wallet takes effect immediately and affects how you are billed for services.
The dates of the current and next wallet cannot overlap.
If you leave a gap between the current and next wallet, the account inherits the wallet from the parent account during that time.
Date is always converted to UTC datetime. For example:
End datetime: 01.03.2026 00:00 UTC. Start datetime: 30.06.2026 00:00 UTC.
Start and end datetime can be the same, resulting in a smooth wallet transition.
You can also use the Active services view to narrow down the exact cloud region you want to manage.