Upgrade Managed Kubernetes cluster on cloud environment
You can upgrade your Managed Kubernetes cluster to the next available minor Kubernetes version. The upgrade is performed in a rolling manner, which helps keep applications and services available while cluster components are being updated.
Before upgrading, review application compatibility with the target Kubernetes version, confirm that backups are in place, and make sure that the cluster is healthy.
What we are going to cover
Prerequisites
1. Hosting account on cloud environment
To use Managed Kubernetes, you need:
your general cloud environment account https://my.cloud.eumetsat.int
access to the Managed Kubernetes dashboard at https://mks.cloud.eumetsat.int/
No. 2 Supported Managed Kubernetes region
Upgrade availability is checked in the region where the cluster is running. Make sure that you are working with the correct region in the Managed Kubernetes dashboard.
Available Managed Kubernetes regions for cloud environment:
R1
R2
FRA1-3
3. Backup
Create or verify a backup before upgrading. See Managed Kubernetes Backups on cloud environment.
4. Application compatibility
Review the target Kubernetes version before upgrading. Check whether your workloads, manifests, Helm charts, operators, CRDs, admission webhooks, storage integrations, and ingress configuration are compatible with the target version.
Upgrading to a newer version of Managed Kubernetes
First, check whether a newer Kubernetes version is available for your cluster. If your cluster is already on the highest available version, the upgrade option is not offered.
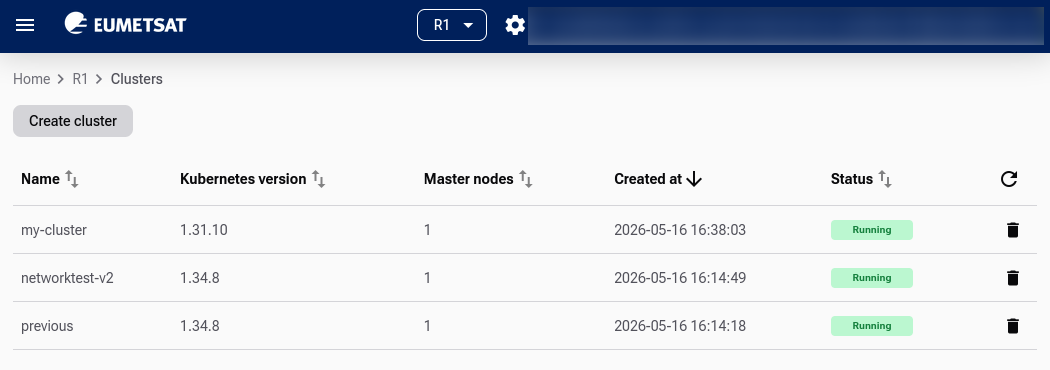
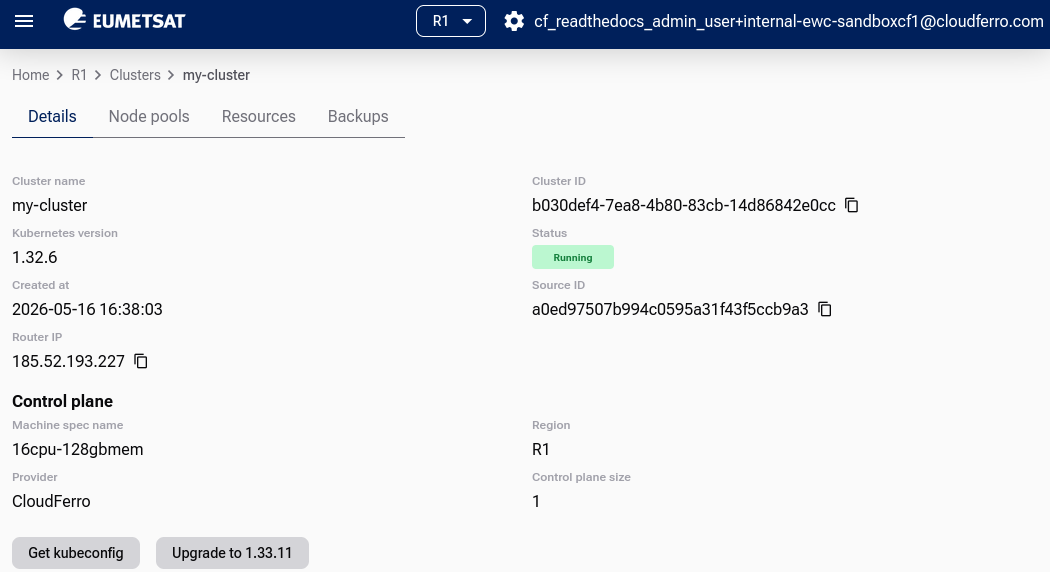
If an upgrade is available, open the cluster details page.
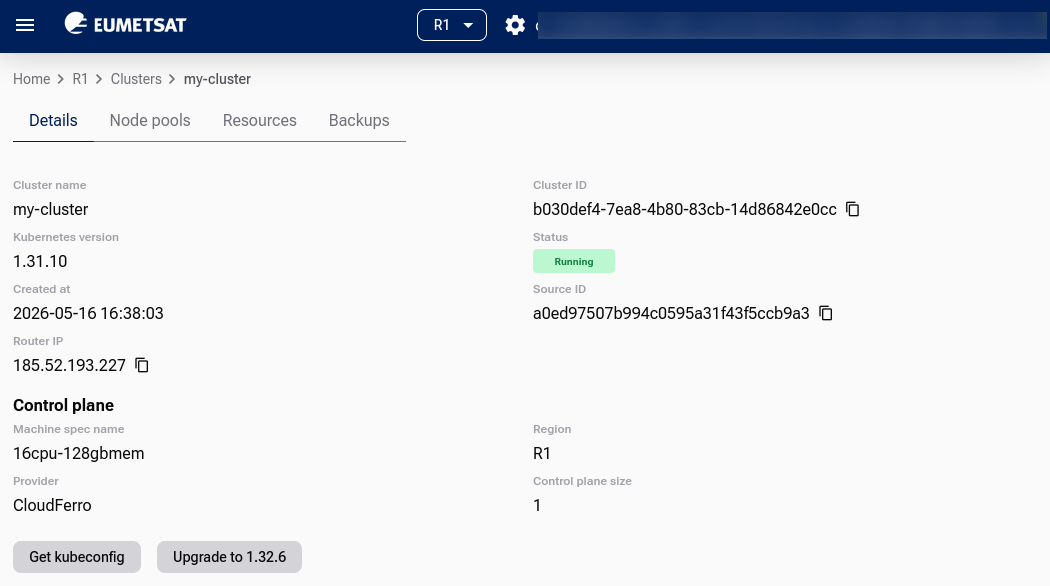
Click Upgrade to <version> and confirm in the modal window.

While the upgrade runs, the cluster status changes to  .
.
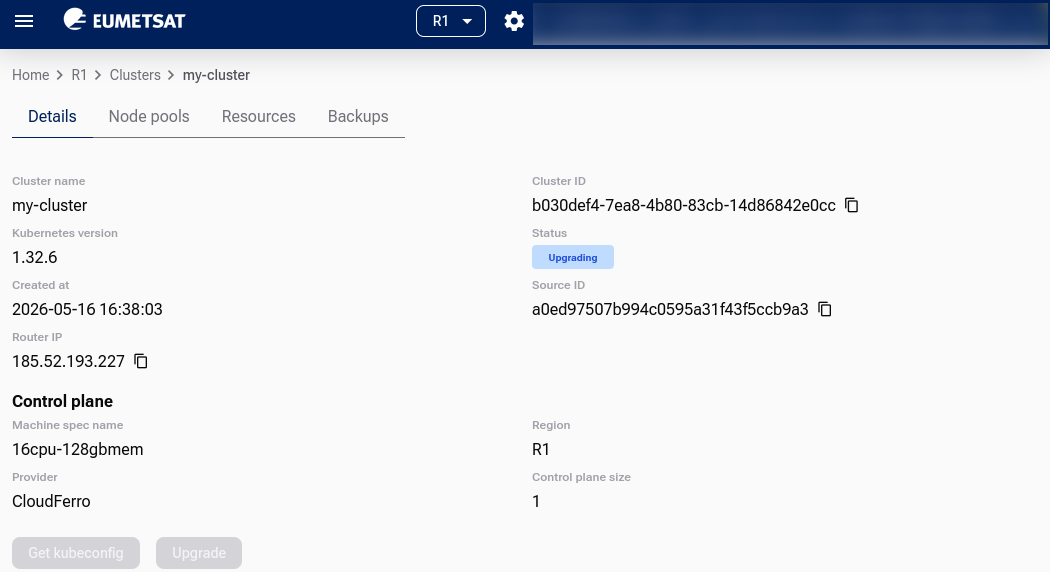
When the upgrade completes, the cluster returns to  and the Kubernetes version is updated in the cluster details.
Note
The Upgrade button remains active only if an even newer version is available.
The downloaded kubeconfig remains valid across upgrades.
After the upgrade
After the cluster returns to , verify that the cluster and workloads are healthy.
Check the nodes:
kubectl get nodes -o wide
All nodes should be in the Ready state and should report the expected Kubernetes version.
Check system workloads:
kubectl get pods -A
Verify in particular that DNS, networking, storage-related components, ingress controllers, monitoring agents, and application workloads are running as expected.
Also verify:
key applications and ingress endpoints work,
persistent volumes are attached and available,
application logs do not show new errors,
monitoring and backup tools still work,
autoscaling and node pools behave as expected.
Troubleshooting
If a workload does not behave as expected after the upgrade:
check pod status with kubectl get pods -A,
inspect failing pods with kubectl describe pod,
review logs with kubectl logs,
verify that CRDs, operators, admission webhooks, and Helm releases are compatible with the target Kubernetes version,
compare the result with your pre-upgrade backup and application checks.
If the cluster itself does not return to a healthy state, contact Support and provide the cluster name, region, cluster ID, and the time when the upgrade was started.
What To Do Next
After a successful upgrade, keep monitoring the cluster for some time and review your backup policy.
To understand the version lifecycle, see /kubernetes/Managed-Kubernetes-Version-Support-Model.
To review responsibilities before future upgrades, see Managed Kubernetes Shared Responsibility Model on cloud environment.
To manage backups, see Managed Kubernetes Backups on cloud environment.