Create an IPv6 network on cloud environment
This article shows the normal tenant workflow for creating an IPv6-enabled network on cloud environment by using the OpenStack CLI.
By the end of this article, you will have:
created a network
created an IPv6 subnet
created a router
attached the subnet to the router
attached an instance to the network
confirmed that the instance received an IPv6 address
If you want to understand why these settings are recommended and what IPv6 limitations to keep in mind, continue with the companion article:
/cloud/Understand-IPv6-on-Eumetsat-Elasticity
What we are going to cover
Prerequisites
No. 1 Account
You need a cloud environment hosting account.
No. 2 OpenStack CLI client
If you want to interact with the cloud environment cloud by using the OpenStack CLI client, you need to have it installed. Check one of these articles:
How to install OpenStackClient for Linux on cloud environment
How to install OpenStackClient GitBash for Windows on cloud environment
Once you have installed this software, you need to authenticate before you can start using it: How to activate OpenStack CLI access to cloud environment cloud
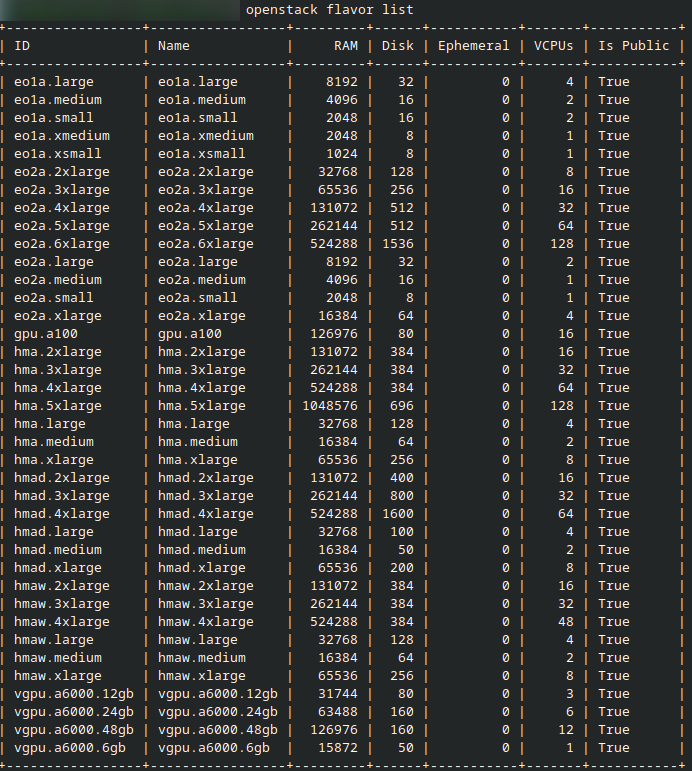
To test whether the openstack command is working, list flavors:
openstack flavor list
If you get a list of flavors, you will know that the command is working correctly.
Create the IPv6 network
The commands below use the recommended basic settings for normal tenant usage:
IPv6
SLAAC
default subnet pool
router with external gateway
Step 1: Create the network
Start by creating a network:
openstack network create ipv6-network
This is the result in Terminal.
Step 2: Create the IPv6 subnet
Create the IPv6 subnet and enable SLAAC:
openstack subnet create \
--ip-version 6 \
--ipv6-ra-mode slaac \
--ipv6-address-mode slaac \
--use-default-subnet-pool \
--network ipv6-network \
ipv6-subnet
This creates an IPv6 subnet on the network and enables automatic address assignment by using SLAAC.
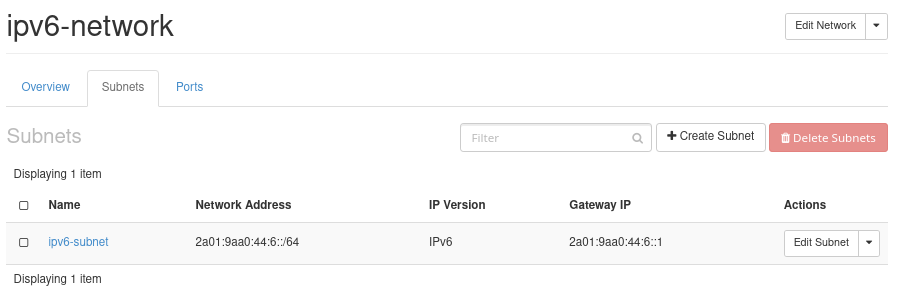
IPv6 subnet details for the tenant network. Open Network > Networks, select your network, and open the Subnets tab.
Step 3: Create the router
Create a router so that the subnet can communicate beyond its local segment:
openstack router create router1
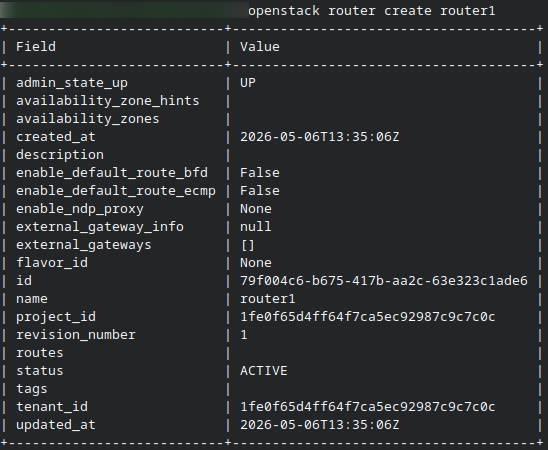
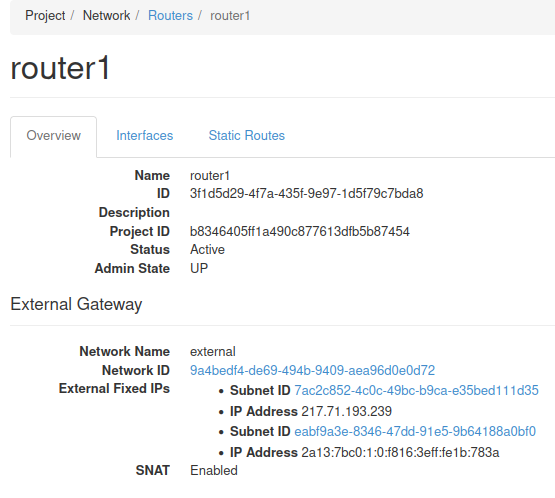
Newly created router in Horizon. Open Network > Routers .
Step 4: Set the external gateway
Configure the router to connect to an external network:
openstack router set router1 --external-gateway external
This step gives the router a path toward the external network.
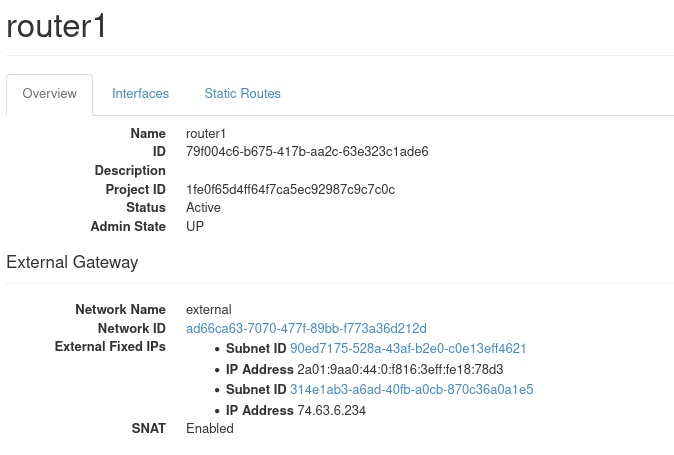
Router with external gateway configured. Open Network > Routers, select the router, and review its overview or details page.
Step 5: Attach the subnet to the router
Attach the subnet to the router:
openstack router add subnet router1 ipv6-subnet
After finishing these steps, the result can be reviewed in the network topology.
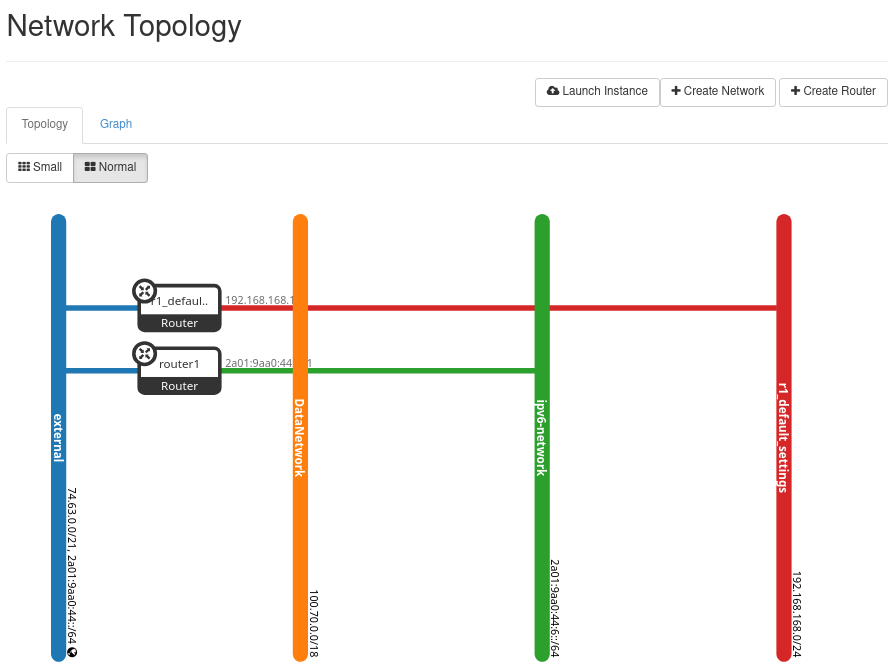
IPv6 network connected to the router in Horizon topology view. Open Network > Network Topology .
At this point, your IPv6 subnet is ready to be used by instances attached to this network.
Attach an instance and verify IPv6
The final step is to attach an instance to the network and confirm that it actually receives and uses IPv6 as expected.
Step 6: Attach a new or existing instance to the network
You can either launch a new instance on the network or attach an additional interface from an existing instance to it.
For example, to create a new instance on the IPv6-enabled network:
openstack server create \
--flavor eo1a.xmedium  \
--image "Ubuntu 24.04 LTS" \
--network ipv6-network \
--key-name sshkey \
ipv6-test-server
Replace the image name, flavor, and key pair with values available in your project.
If you want to use an existing instance instead, first list its ports and networks, then add a port or interface connected to the IPv6-enabled network.
Step 7: Confirm that the instance received an IPv6 address
Display the instance details:
openstack server show ipv6-test-server
Look for the addresses field. It should show an IPv6 address from your new subnet.
You can also display the server addresses more directly:
openstack server show ipv6-test-server -c addresses

Instance connected to the IPv6-enabled network and showing an IPv6 address.
The same data, only visible from Horizon:
Open Compute > Instances, select the instance, and review its details or interfaces.
Step 8: Verify that traffic is allowed
If public IPv6 is used, verify that the expected traffic is allowed by the security group.
For example, display the security groups attached to the instance:
openstack server show ipv6-test-server -c security_groups
The result is:

The security group which allows IPv6 traffic.
If needed, inspect the rules of the relevant security group:
openstack security group rule list <security-group-name>
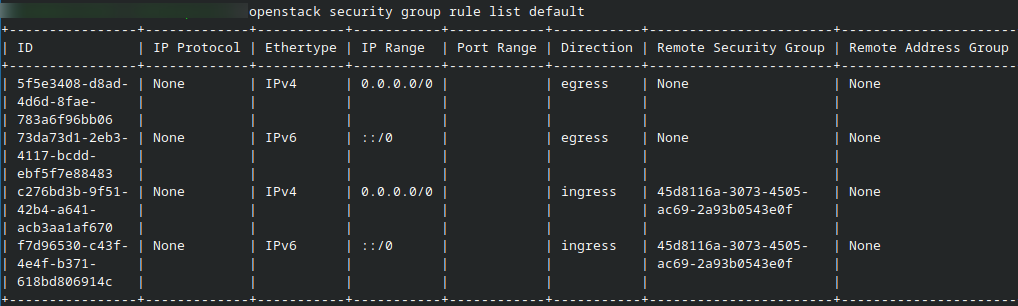
The internal data of the security group ‘default’
Remember that IPv6 traffic must be allowed explicitly. For example, ::/0 represents any IPv6 source address.
Step 9: Do a simple connectivity check
Once the instance has an IPv6 address, sign in to it and inspect its network configuration:
ip -6 addr
You should see the IPv6 address assigned to the interface connected to ipv6-network.

The addresses to which IPv6 is assigne.
If your instance should have public IPv6 connectivity, you can also test outbound connectivity from inside the instance, for example:
ping -6 ipv6.google.com
Troubleshooting checks
If connectivity does not work, check the following first:
confirm that the instance is attached to the correct network
confirm that the instance received an IPv6 address
confirm that the subnet is attached to the router
confirm that the router has an external gateway
confirm that the security group allows the expected IPv6 traffic
What to do next
You have now created an IPv6-enabled tenant network and verified that an instance can receive an IPv6 address on it.
To continue, read the companion article:
/cloud/Understand-IPv6-on-Eumetsat-Elasticity
That article explains:
private and public IPv6 networks
single-stack and dual-stack usage
security groups for IPv6
SLAAC and address assignment modes
load balancer limitations
important IPv6 considerations on cloud environment