How to create Windows VM on OpenStack Horizon and access it via web console on cloud environment
This article shows how to create a functional Windows VM on cloud environment cloud using the Horizon graphical interface.
The workflow is to:
start the creation of a Windows virtual machine from the Horizon dashboard,
access the virtual machine through the web console,
set the Administrator password,
update Windows after the first login.
What we are going to cover
Accessing the Launch Instance menu
Choosing the instance name
Choosing the source image
Choosing the flavor
Attaching networks
Choosing security groups
Launching the virtual machine
Setting the Administrator password
Updating Windows
Prerequisites
No. 1 Account
You need a cloud environment hosting account with access to the Horizon interface:
https://horizon.cloudferro.com/
Choose ECIS and FRA1-3 as the region.
Step 1: Access the Launch Instance menu
In the Horizon dashboard, navigate to Compute -> Instances.
Click Launch Instance at the top of the Instances section.
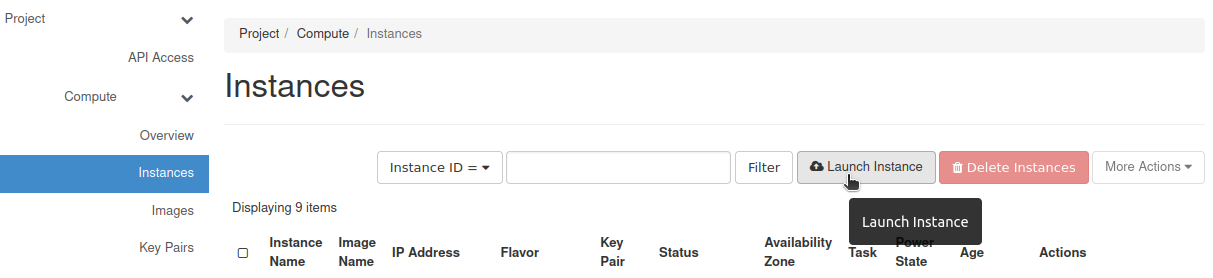
Launch Instance button in Horizon
You should get the Launch Instance window.
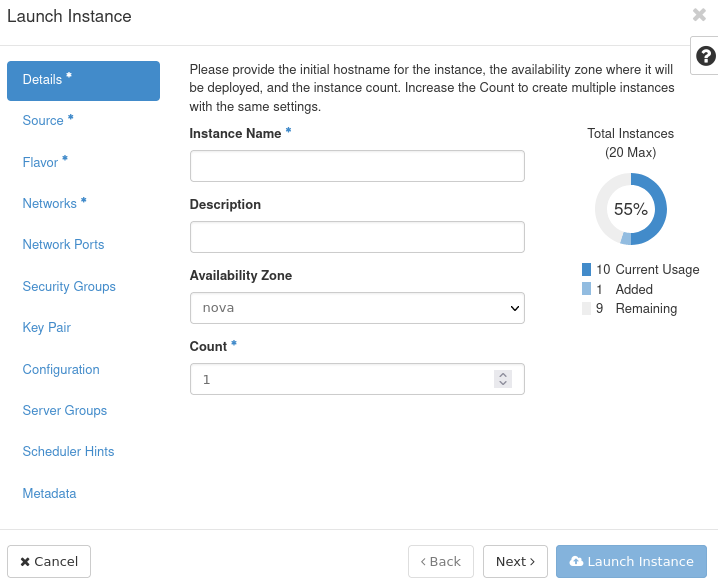
Launch Instance window in Horizon
Step 2: Choose the instance name
In the Instance Name text field, enter the name you want to give to your instance.
In this example, the instance is called test-windows-vm.
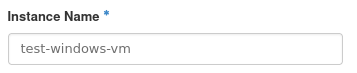
Enter the Windows VM instance name
Click Next >.
Step 3: Choose source
The default value in the Select Boot Source drop-down menu is Image. This means that you will choose from the images available in Horizon.
If another value is selected, change it back to Image.
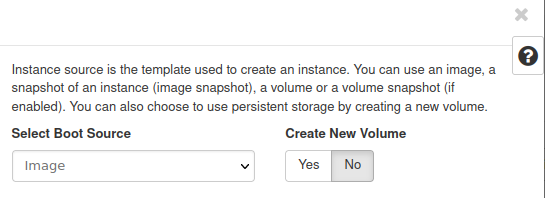
Select Image as the boot source
Enter windows in the search field in the Available section to filter Windows images.
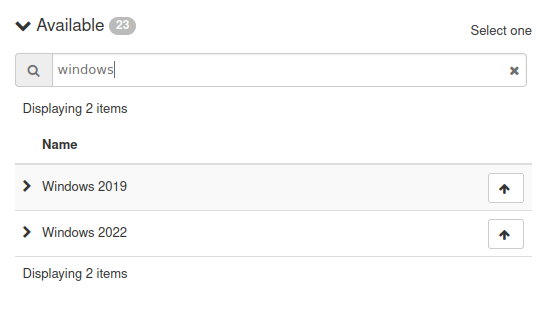
Filter Windows images
Choose the newest available Windows image by clicking ↑ next to it.

Allocate a Windows image
The chosen image should appear in the Allocated section.
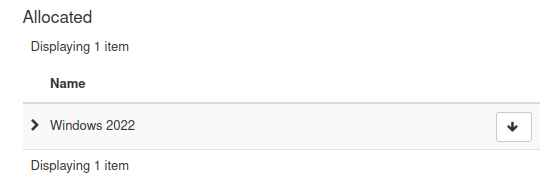
Windows image allocated as source
Click Next >.
If you allocate the wrong image by mistake, remove it from the Allocated section by clicking ↓ next to its name.
Step 4: Choose flavor
In this step, choose the flavor of your virtual machine. Flavors define access to resources such as vCPUs, RAM, and storage.
The following screenshot shows what the flavors table looks like in general.
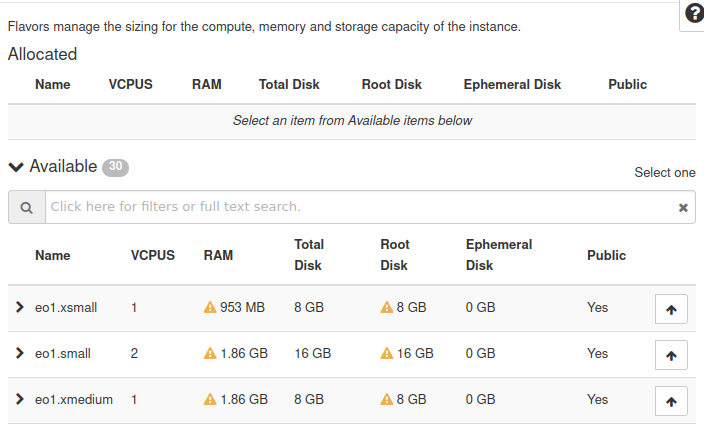
Flavor selection table
Yellow warning triangles indicate that a flavor is not available to you. To see the reason, hover the mouse over the warning triangle.
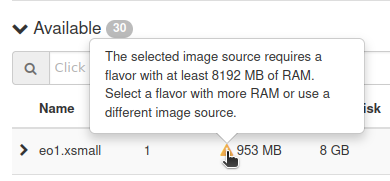
Flavor availability warning
Use a flavor suitable for Windows. The available flavor names may differ between regions and environments, so check the actual flavor list in Horizon.
A practical way to find Windows-compatible flavors is to search for common Windows flavor prefixes used in your environment, or to check the flavor description and available quota. If you are not sure which flavor to use, ask your project administrator or support team.
Choose the flavor that suits your workload and click ↑ next to it to allocate it.
Click Next >.
Note
In the examples that follow, two networks are shown. One network name starts with cloud_ and another with eodata_. The first network should normally be present in the project. The second one may or may not be present, depending on your environment. If you do not have a network whose name starts with eodata_, use another suitable network that exists in your project.
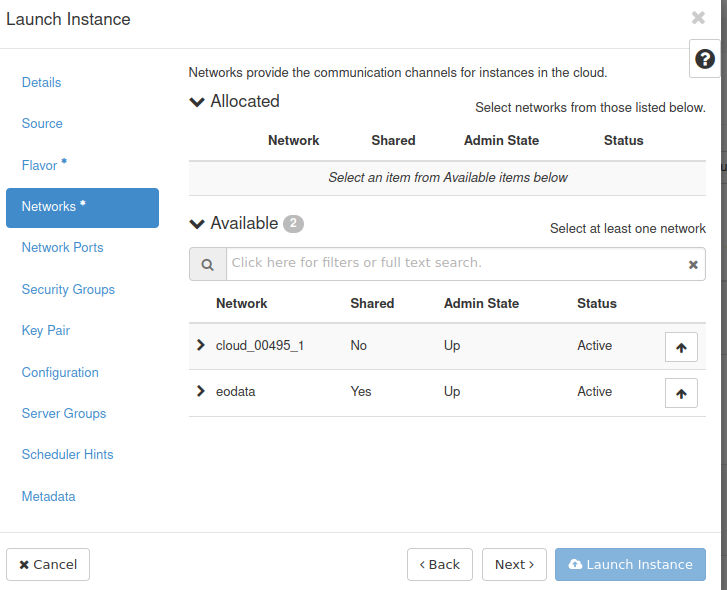
Step 5: Attach networks to your virtual machine
The next step contains the list of networks available to you.
Network selection in Horizon
By default, you should usually have access to a project network. This network can be used to connect your virtual machines and to access the Internet, depending on the project configuration.
If an eodata network is available and you need access to the EODATA repository from the VM, allocate it as well.
Allocate the networks you want to attach to the VM and click Next >.
The next step is called Network Ports. In this article, you do not need to change anything there. Click Next >.
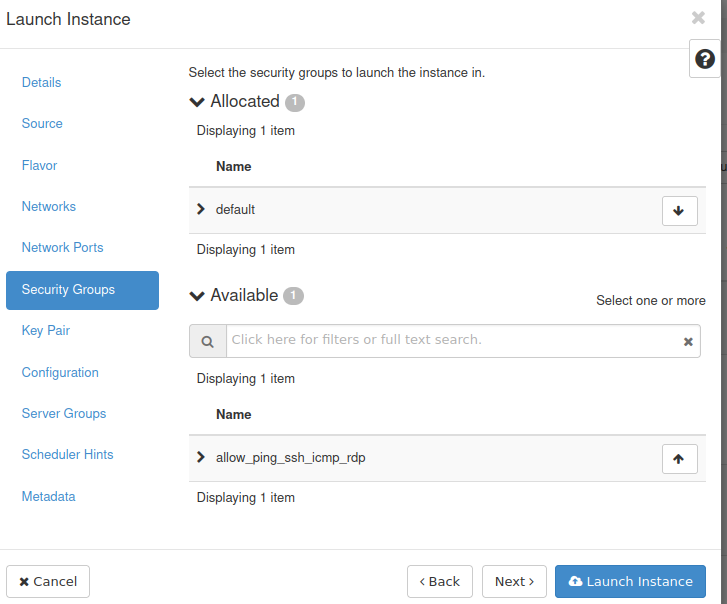
Step 6: Choose security groups
Security groups control network traffic for your virtual machine.
In this step, make sure that the default security group is allocated. It usually blocks incoming network traffic and allows outgoing traffic.
The security group allow_ping_ssh_icmp_rdp, or a similarly named group, may expose your VM to several types of incoming traffic. Do not allocate it if you only intend to access the VM through the web console.
Security group selection for the Windows VM
You should still be able to perform standard Windows operations such as browsing the Internet or accessing email without exposing RDP directly.
Step 7: Launch your virtual machine
Other steps in the Launch Instance window are optional for this basic workflow.
After completing the previous steps, click Launch Instance.

Launch the Windows VM
Your virtual machine should appear in the Instances section of the Horizon dashboard. Wait until its Status changes to Active.

Windows VM in Active status
Once the Status is Active, the virtual machine should be running.
Step 8: Set the Administrator password
Once your instance has Active status, click its name.

Open the Windows VM details page
You should see a page containing information about your instance. Navigate to the Console tab.
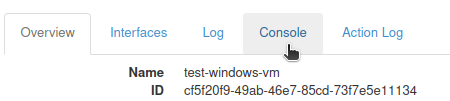
Open the Console tab
You should see the web console, which lets you control the virtual machine from the browser.
When Windows finishes startup, you should see a prompt to set the Administrator password.
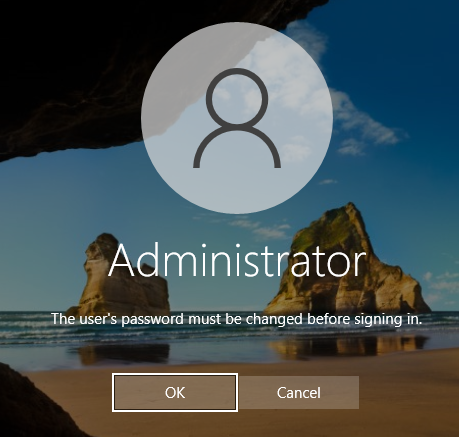
Prompt to set the Administrator password
Click OK.
You should now see two text fields.
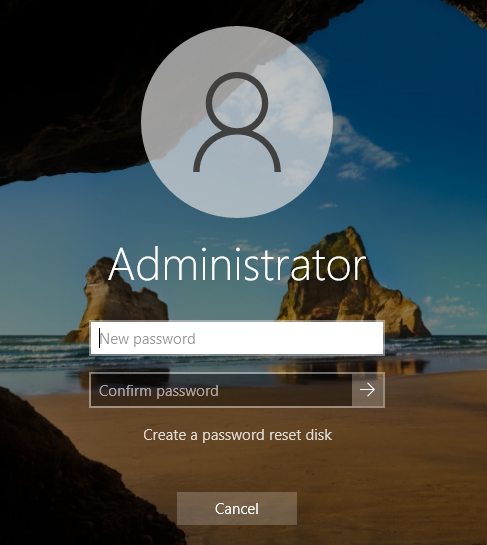
Administrator password fields
Enter your chosen password in the New password text field.
Enter it again in the Confirm password text field.
Click the right arrow next to the Confirm password text field.
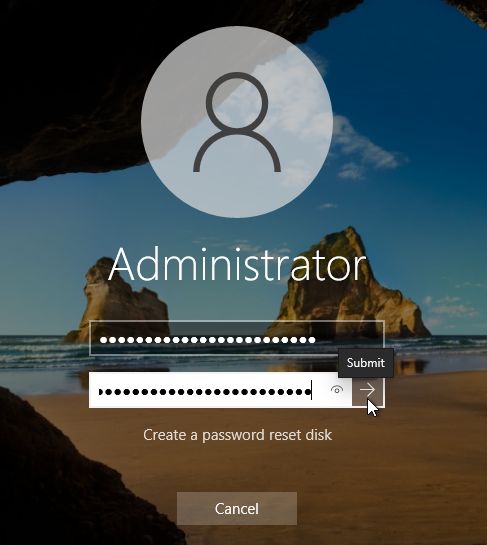
Confirm the Administrator password
You should get a confirmation.
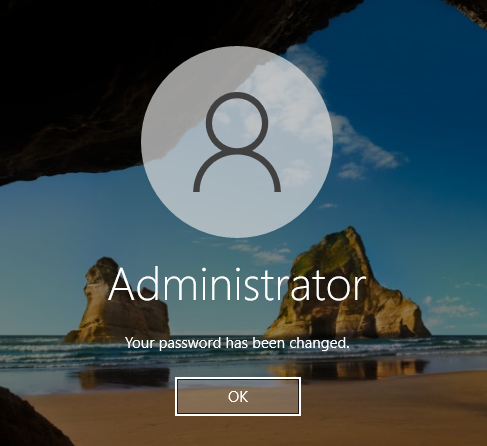
Administrator password confirmation
Click OK.
Wait until you see the standard Windows desktop.
Step 9: Update Windows
Once the Windows virtual machine is running, update the operating system to install the latest security fixes.
Click Start, and then Settings.
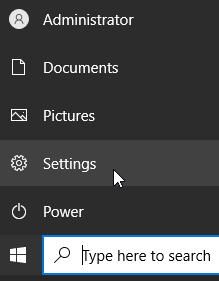
Open Windows Settings
Click Update & Security.
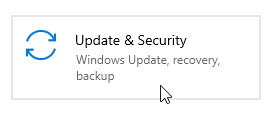
Open Update and Security
You should now see the Windows Update screen.
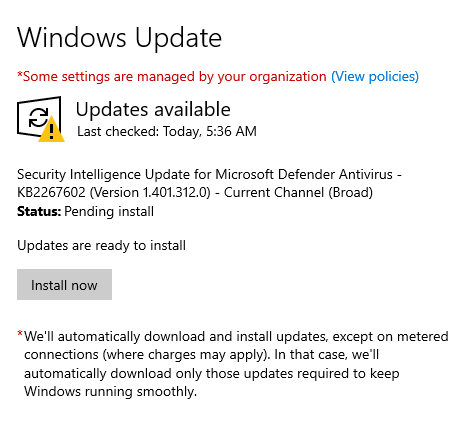
Windows Update screen
Follow the prompts to update the operating system.
What to do next
To learn how to access the EODATA repository on your new Windows virtual machine, check this article:
/eodata/How-to-mount-eodata-on-Windows-virtual-machine-on-Eumetsat-Elasticity-hosting
If you want to access your virtual machine remotely using RDP, consider using a bastion host to improve security.
Connecting to a Windows VM via RDP through a Linux Bastion Host port forwarding on cloud environment
To learn more about security groups, see this article: