How to install OpenStackClient for Linux on cloud environment
The OpenStack CLI client allows you to manage OpenStack environments from the command line. You can use it to perform tasks such as:
creating, starting, shutting down, shelving, deleting, and rebooting virtual machines,
assigning a floating IP address to a virtual machine,
listing available resources, including volumes, virtual machines, and floating IP addresses,
automating OpenStack operations with scripts.
This article covers two methods of installing OpenStackClient on Ubuntu.
The first method uses the Ubuntu package manager. It is more convenient and is sufficient for most use cases.
The second method uses pip inside a Python virtual environment. It is intended for more advanced use cases, such as:
keeping multiple versions of OpenStackClient ready to use on the same computer,
using a newer or different version than the one available from Ubuntu packages,
installing OpenStackClient on a Linux distribution where the Ubuntu package method is not available.
Prerequisites
No. 1 Hosting account
You need a cloud environment hosting account with access to the Horizon interface: https://my.cloud.eumetsat.int.
No. 2 Linux installed on your computer
You need Linux installed on your local computer or on a virtual machine.
This article was written for Ubuntu 22.04 LTS and Python 3. Instructions for other Linux distributions may be different.
If you choose a virtual machine hosted on cloud environment cloud, the following articles can help:
What we are going to do
Install OpenStackClient using apt or pip
Verify that the installation was successful
Learn where to go next to authenticate and use OpenStack CLI commands
Step 1: Install OpenStackClient
Method 1: Using the Ubuntu package manager
Update Ubuntu packages:
sudo apt update && sudo apt upgrade
Reboot if required.
Once the packages are updated, install the openstack command from the python3-openstackclient package:
sudo apt install python3-openstackclient
Method 2: Using pip and a Python virtual environment
Use this method if you want to install OpenStackClient in an isolated Python environment.
Create and activate a virtual environment
Open the terminal on the system where you want to install OpenStackClient.
Update system packages:
sudo apt update && sudo apt upgrade
Install Python development files:
sudo apt install python3-dev
Install the package used to create Python virtual environments. If Python is not installed yet, the following command should pull it as a dependency:
sudo apt install python3-venv
Create a new virtual environment called openstack_cli:
python3 -m venv openstack_cli
Activate the environment:
source openstack_cli/bin/activate
Important
In the future, each time you start the terminal and want to use this OpenStackClient installation, you need to enter the same virtual environment again.
After activation, the prompt should show (openstack_cli) as a prefix:

Install OpenStackClient
Before installing OpenStackClient, upgrade pip:
pip install --upgrade pip
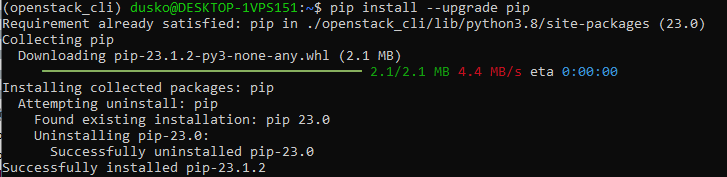
Install the python-openstackclient package:
pip install python-openstackclient
This installs the openstack command, which allows you to interact with OpenStack services from the command line.
You can use multiple virtual environments if you need to keep different versions of OpenStackClient available on the same machine.
Step 2: Verify that installation was successful
You can verify the installation by using the built-in –help option. If you can view the openstack help screen, the installation was successful.
Important
If you installed OpenStackClient inside a virtual environment, make sure that your current terminal session has activated that environment before running the openstack command.
Execute:
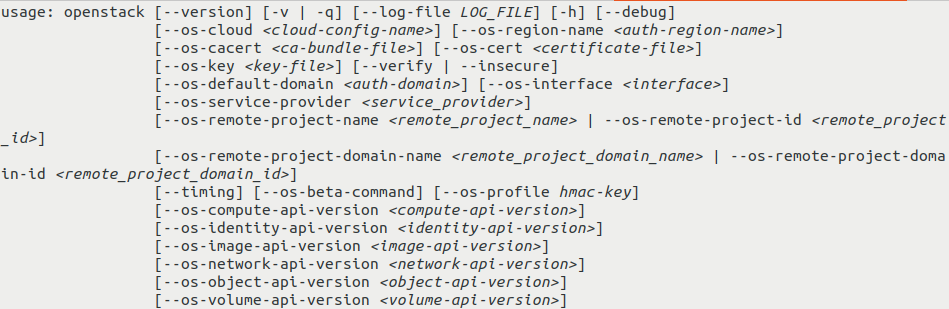
openstack --help
You should see information about using the OpenStack CLI command. The beginning of the output should look like this:
If the command shows its output in a pager, use the arrow keys, or vim keys such as j and k, to scroll through the text. Press q to exit.
If you can read the help screen, OpenStackClient is installed correctly.
What to do next
Authenticate before using OpenStack commands
Before you can use OpenStack CLI to manage resources in your cloud environment environment, you need to authenticate.
How to activate OpenStack CLI access to cloud environment cloud
After successful authentication, you will be able to run commands such as:
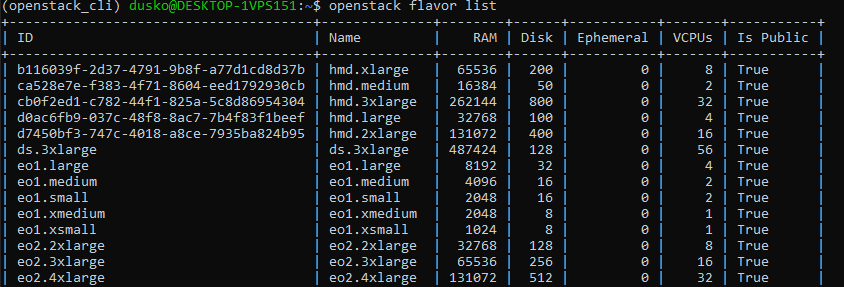
openstack flavor list
This command lists flavors available in your project. The output may look like this:
Install additional OpenStack clients
The package installed in this article provides the basic OpenStack commands.
If you want to use additional OpenStack services from CLI, such as load balancers, DNS as a service, orchestration, or object storage, you may need additional client packages.
Depending on the method you used to install OpenStackClient, use one of the tabs below.
In the official Ubuntu apt repository, additional OpenStack client package names usually follow this syntax:
python3-<project>client
In this syntax, <project> is the OpenStack project name, such as octavia or designate.
The following command installs several commonly used clients:
sudo apt install python3-manilaclient python3-octaviaclient python3-designateclient python3-barbicanclient python3-heatclient python3-magnumclient python3-novaclient python3-swiftclient python3-glanceclient python3-cinderclient
In pip, additional OpenStack client package names usually follow this syntax:
python-<project>client
In this syntax, <project> is the OpenStack project name, such as octavia or designate.
The following command installs several commonly used clients:
pip install python-manilaclient python-octaviaclient python-designateclient python-barbicanclient python-heatclient python-magnumclient python-novaclient python-swiftclient python-glanceclient python-cinderclient
Describing each additional client is beyond the scope of this article.
Installation on Windows
You can also install OpenStackClient on Windows by using Git Bash, Cygwin, or Windows Subsystem for Linux.