How to mount an NFS Share on a Linux VM
Note
Shares functionality is present only in regions R1 and R2.
A share created in Horizon does not appear automatically as a folder inside a virtual machine. Even after the share is created and the access rule is active, the Linux operating system still has to mount the NFS export before applications can use it.
This article shows how to connect a Linux VM to an OpenStack NFS share. You will copy the preferred export location from Horizon, connect to the VM over SSH, install the required NFS client tools if they are missing, create a local mount point, and mount the share as a directory in the VM.
After the share is mounted, the VM can use it like a normal filesystem path. This makes the share suitable for common files, project data, processing input and output, application directories, or any workflow where data must remain outside the VM disk and be available through shared storage.
Prerequisites
Before you mount an NFS share on a Linux VM, make sure that the share and VM are already prepared.
You need a cloud environment hosting account with access to the Horizon interface:
https://horizon.cloudferro.com/
Choose ECIS and FRA1-3 as the region.
You have selected the correct project in Horizon.
The share, access rule, and VM must belong to the project in which you are working.
You have created an NFS share and allowed access to it.
The share must have the Available status, and an active access rule must already allow the VM’s internal OpenStack IP address or private subnet.
To prepare the share and access rule, use the previous articles in this series:
You have copied the preferred NFS export location from Horizon.
The export location is the NFS path used in the mount command. It usually has this form:
share-server-address:/share-path
To find it, open:
Project → Share → Shares → share-name
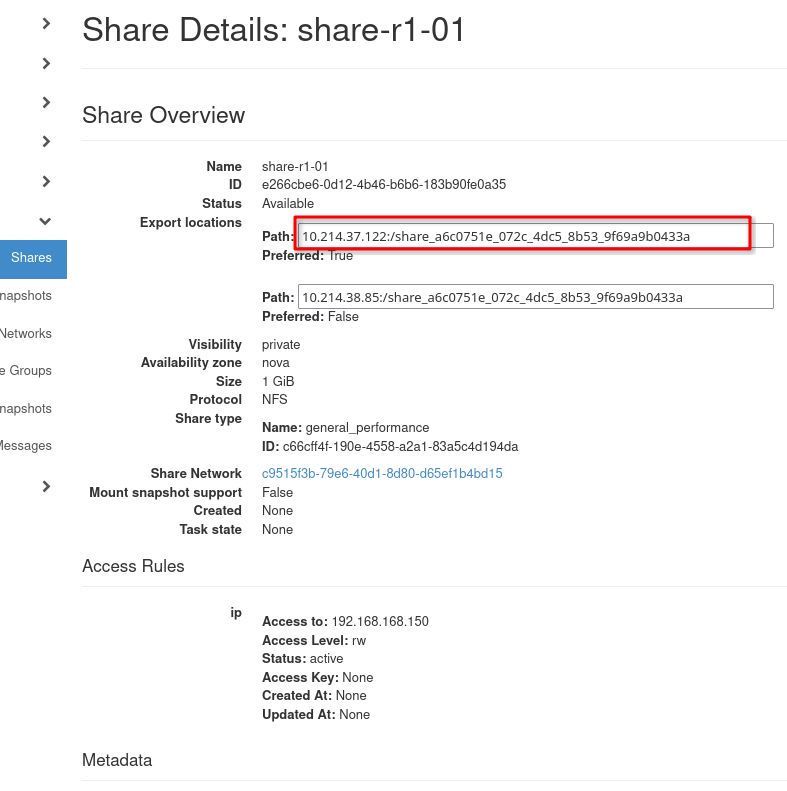
Export location of the NFS share.
Horizon marks one export location as Preferred: True. Copy it exactly as shown in Horizon and use as the location in the mount command.
You have SSH access to the Linux VM and sudo privileges.
The mount operation is performed inside the VM. Make sure that you can log in to the VM over SSH and run commands with sudo.
This article also uses nano to edit /etc/fstab. If nano is not installed on the VM, install it together with the NFS client tools in the installation step, or use another text editor already available on the VM.
Connect to the Linux VM
Connect to the Linux virtual machine that will mount the share.
Use the normal SSH method for your environment.
ssh username@vm-floating-ip-address
Replace username and vm-floating-ip-address with the values for your virtual machine.
Install NFS client tools
The Linux VM must have NFS client tools installed before it can mount the share. This article also uses nano to edit /etc/fstab, so install it if it is not already present.
On Ubuntu or Debian, install the nfs-common and nano packages:
sudo apt update
sudo apt install nfs-common nano
On AlmaLinux, Rocky Linux, CentOS Stream, or another RHEL-compatible distribution, install the nfs-utils and nano packages:
sudo dnf install nfs-utils nano
After installation, the VM can mount NFS shares and you can edit /etc/fstab with nano.
Test writing to the share
Create a test file:
echo "NFS share test" | sudo tee /mnt/share1/test-file.txt
List the directory contents:
ls -l /mnt/share1
If the file appears, the share is mounted and writable.
Here is what the entire process looks like in Terminal window:

Create a mounted NFS share
If you configured the share access rule as read-only, the write test will fail. In that case, use a read-only test instead.
Troubleshooting
If the mount command fails, check the following:
The share has the Available status in Horizon.
The access rule has been added to the share.
The access rule allows the correct IP address or network.
The Linux VM can reach the share network endpoint.
NFS client tools are installed.
Security groups and network routes allow the required NFS traffic.
You copied the export location exactly as shown in Horizon.
User messages for debugging
You can also check user messages in Horizon, via the following chain of commands:
Project → Share → User Messages
User Messages page for share-related errors.
The User Messages page may provide more information if the share operation failed or if the service reported an error.
What to do next
After mounting the share, you can use it as a shared directory for files, datasets, application data, or processing results.