How to allow access to a Share
Note
Shares functionality is present only in regions R1 and R2.
A newly created share is not automatically available to virtual machines. Before a VM can mount an NFS share, you must add an access rule that allows the VM, or the VM’s private subnet, to connect to the share.
This article shows how to add that access rule in Horizon. For the standard NFS workflow, the Access To value should be the VM’s internal OpenStack IP address, or the private subnet in CIDR format. After the rule becomes active, you can copy the share export location and test the connection from the Linux VM.
Prerequisites
Before you allow acces to a share, make sure that the project, share, VM, and networking prerequisites are in place.
You need a cloud environment hosting account with access to the Horizon interface:
https://horizon.cloudferro.com/
Choose ECIS and FRA1-3 as the region.
You have selected the correct project in Horizon.
Shares, virtual machines, and share access rules are managed inside the currently selected project. Check the project name in the top bar before you continue.
You have an existing NFS share with the Available status.
The share must already exist before you can add access rules to it. This article follows the standard NFS workflow used in this article series, so the share should use the NFS protocol and have the Available status.
To check existing shares, use commands Project → Share → Shares.
You have a Linux VM that will mount the share.
The VM should be in the same cloud environment and in a network path that can reach the share endpoint. If you do not have a suitable VM yet, create one before continuing.
To create a new VM, use this article: How to create new Linux VM in OpenStack Dashboard Horizon on cloud environment.
You have SSH access to the Linux VM.
After the access rule is created, you must connect to the VM and mount the share from the operating system. Make sure that you can log in to the VM over SSH before continuing. The following articles may be of help:
How to connect to a virtual machine via SSH from Windows 10 Command Prompt on cloud environment
How to connect to your virtual machine via SSH in Linux on cloud environment
You know which internal IP address or private subnet should be allowed.
For one VM, use the VM’s internal OpenStack IP address in the Access To field.
Example:
10.84.53.233
For several VMs in the same private subnet, use the private subnet in CIDR format.
Example:
10.84.53.0/24
Do not use the VM’s floating IP address for this workflow. Floating IPs are used for external access to the VM, while the NFS share is reached through the internal cloud network.
Open the Shares page
Log in to Horizon and select the correct project. To open the Shares page, use the following navigation path:
Project → Share → Shares
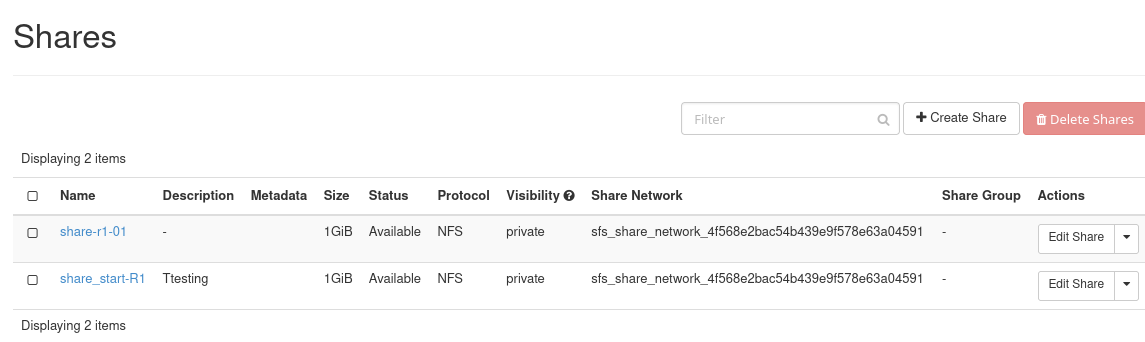
Shares page in Horizon.
The Shares page lists the shares available in the selected project. Find the share for which you want to configure access and make sure that its status is Available.
Open the share actions menu
In the row of the share, open the Actions menu on the right side. Use commands:
Project → Share → Shares → Actions
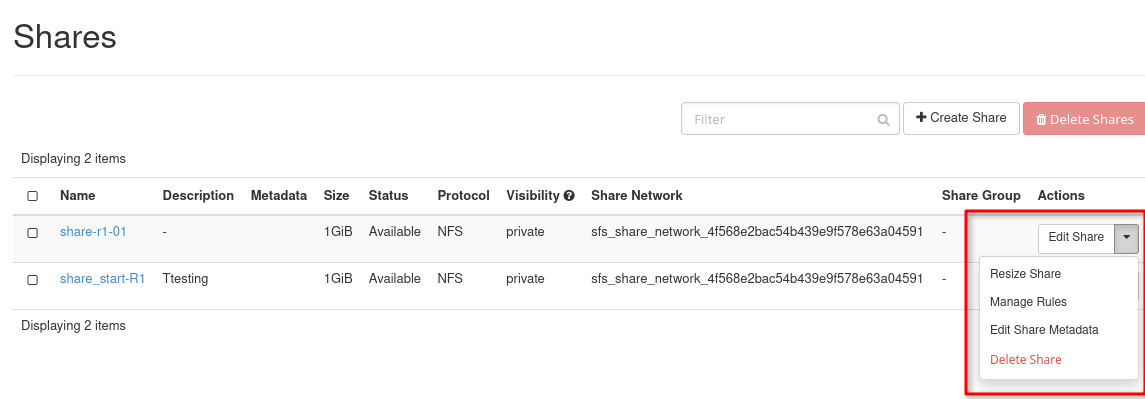
Share actions menu.
Select option Manage rules.
Open the access rules page
Open the page or dialog used for managing access to the selected share. To reach the access rules screen, use:
Project → Share → Shares → Actions → Manage Rules
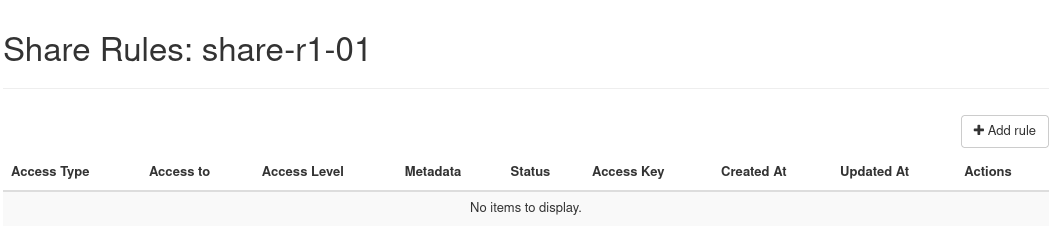
Manage Rules window for the selected share.
The Manage Rules window shows the access rules that already exist for the selected share. From this window, you can add a new rule and later verify whether the rule is active.
Add a new access rule
Click the option for adding a new rule. To add a rule, use:
Project → Share → Shares → Actions → Manage Rules → Add Rule

Add share access rule.
For an NFS share, the rule contains the access type, the client that should be allowed to connect, and the access level.
Use the following fields:
Access Type – select ip.
Access To – enter the internal OpenStack IP address of the VM, or the private subnet that should access the share.
Access Level – select read-write or read-only, depending on the intended usage.
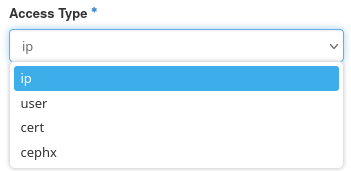
Select the IP access type.
Use read-write when the VM must create, modify, or delete files on the share. Use read-only when the VM should only read files from the share.
For the standard workflow, do not use the VM’s floating IP address in the Access To field. The floating IP is used for external access to the VM, while the NFS share is reached through the internal cloud network.
Example access rule
In this example, the VM has addresses on two networks.
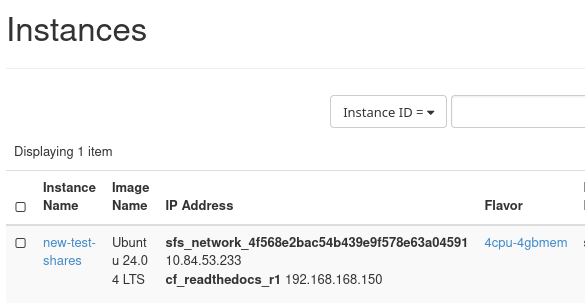
VM addresses in Horizon.
The VM has the following addresses:
sfs_network_4f568e2bac54b439e9f578e63a04591
10.84.53.233

cf_readthedocs_r1
192.168.168.150, 185.52.192.213
The address 185.52.192.213 is the floating IP address. Do not use it for the share access rule.
For the share access rule, use the VM IP address from the sfs_network_… network:
10.84.53.233
In Horizon, enter the following values:
Access Type: ip
Access To: 10.84.53.233
Access Level: read-write
This allows the VM with the internal IP address 10.84.53.233 to access the share.
If several VMs in the same private subnet need access, you can allow the subnet in CIDR format instead, for example:
10.84.53.0/24
Use a subnet rule only when all VMs in that subnet should be allowed to access the share.
Confirm the access rule
After entering the access rule, click the button that confirms the rule creation. To submit the rule, use:
Project → Share → Shares → Actions → Manage Rules → Add Rule → Add
The rule is added to the list of access rules for the share.
Verify the access rule
After the rule is created, check that it appears in the access rules list. To verify the rule, use:
Project → Share → Shares → Actions → Manage Rules
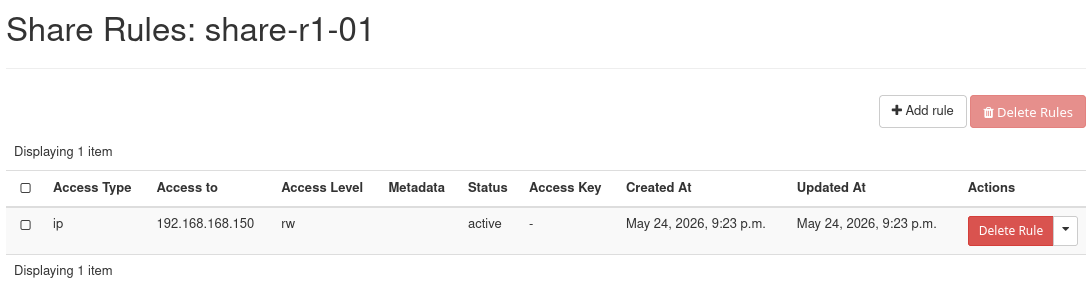
Active access rule for the share.
In this example, the rule allows the VM with the internal IP address 10.84.53.233 to access the share. The Status column shows active, which means that the rule has been accepted and can be used for mounting the share from that VM.
The rule must be active before the virtual machine can mount the share. If the rule is missing, incorrect, or not yet active, the mount operation from the Linux VM may fail even if the share itself has the Available status.
Check the export location
Before mounting the share from Linux, you need the export location. Open the share details page to find it. To open the share details page, use:
Project → Share → Shares → share-name
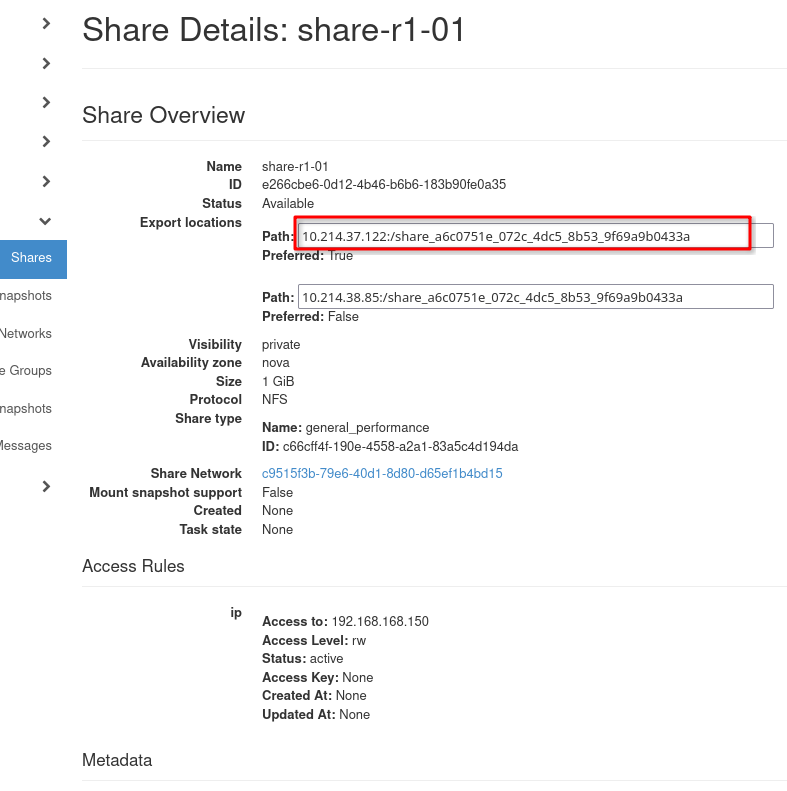
Export location.
Copy the export location exactly as shown in Horizon. You will use it in the mount command on the Linux virtual machine.
The export location usually has a form similar to an NFS path:
share-server-address:/share-path
The exact value is provided by Horizon and must be copied from your environment. Do not replace it with the example value above.
In this example, the share details page shows export locations similar to:
10.214.37.122:/share_a6c0751e_072c_4dc5_8b53_9f69a9b0433a
10.214.38.85:/share_a6c0751e_072c_4dc5_8b53_9f69a9b0433a
In this example, Horizon marks one export location as Preferred: True. Use that preferred export location when mounting the share from the Linux VM.
Test the access from the VM
After the access rule becomes active and you copy the export location, connect to the Linux VM over SSH and test whether the share can be mounted.
For example, if Horizon shows the following preferred export location:
10.214.37.122:/share_a6c0751e_072c_4dc5_8b53_9f69a9b0433a
create a mount point on the VM:
sudo mkdir -p /mnt/share-r1-01
Mount the share:
sudo mount -t nfs 10.214.37.122:/share_a6c0751e_072c_4dc5_8b53_9f69a9b0433a /mnt/share-r1-01
Check that the share is mounted:
df -h /mnt/share-r1-01
You can also check the mounted filesystems:
mount | grep share-r1-01

NFS share mounted from the Linux VM.
If the mount succeeds, the access rule is working and the VM can reach the NFS share.
To unmount the share after the test, use:
sudo umount /mnt/share-r1-01
Troubleshooting
If the mount command fails, check the access rule and the network details before changing the share. The most common problems are an incorrect Access To value, a rule that is not yet active, or use of the VM’s floating IP address instead of the internal OpenStack IP address.
Also check that:
the share has the Available status,
the share uses the NFS protocol,
the VM can be reached over SSH,
the VM is in a network path that can reach the share endpoint,
the export location was copied exactly as shown in Horizon,
NFS client tools are installed in the VM.
What to do next
After access has been allowed, the export location has been copied, and the test mount succeeds, continue with the article on mounting an NFS share on a Linux virtual machine: